Wednesday, July 30, 2014

A GREAT CAUSE

I have amazing friends.  My friend, Carrie Harney, is organizing this amazing fundraiser auction for her friend who just lost her to husband to cancer.
I'm hoping you take the time and check out this auction of amazing artwork
by some very talented ladies!

Click below and it will lead you there!


Here's my necklace for the auction!
Happy Bidding!!

xoxo
LONNIE

Tuesday, July 22, 2014

SPELLBINDERS A GILDED LIFE
SUMMER SHOWCASE & GIVEAWAY
DAY 7

VINTAGE MEMO BOARD

I hope all of you are enjoying the projects being offered in the Spellbinders A Gilded Life Summer Showcase.  I know I have been!  I can't wait to get the chance to make a few of the projects from SueLynn, and Kim.  I love to see the different ways everyone is using their dies, bezels, relics and all the other goodies the line has to offer.  

Today I get to share with you a little Vintage Memo Board project.  As I love to scour thrift stores and flea markets, I decided to use some of those finds along with Spellbinders A Gilded Life products.
All you need is an old picture frame, little bits of lace and trim (which we all have and wonder what to do with), and your favorite picture to go in the bezel.

Let's get started!


Spellbinder A Gilded Life Supplies

Relics A - GLR-001 (Found Here)
Shield Bezel Die Cut- GLD-006 (Found Here)
Shield Bezel 0 GLLB-006 (Found Here)
Quatrefoil Band Die - GLD-003 (Found Here)

 Other Supplies

Frame
Vintaj Metal Paint - I used Quartz
Lace and Muslin - to cover the cork board
Cork
1 yard May Art Velvet Ribbon
2 yards Seam Binding
Buttons
4 or 5 Lace/Trim Scraps
Buttons
Tacks
Spray Adhesive
Fabric Adhesive
Paper Adhesive
Jewelry Wire and Pearl
Novacan Black Patina (optional)

First off, we are going to paint the bezel with the Vintaj metal paint.  Let it dry.  It may take a couple coats.  Once it's dry, lightly sand for a vintage effect.  If you would like the edges more pronounced, antique with Novacan Black Patina.  Using the Spellbinder A Gilded Life shield bezel die cut, cut out your desired picture for your bezel.  Glue in place with paper adhesive.  Set aside.

Make a pattern for your cork and foundation pieces to fit the frame you have selected.  Cut out your cork, muslin and lace.  Using spray adhesive, spray the cork and adhere the muslin.  Smooth out any ripples.  Repeat the step for the lace.  

Determine the lengths you need for your velvet ribbon and cut 3 pieces.  Using the velvet ribbon and the Spellbinders A Gilded Life Quatrefoil Band Die, emboss your velvet.  With fabric adhesive, attach the ribbon at the top and bottom edge.  Leave the middle section free so you will be able to slide envelopes or paper underneath.  

Mount the cork piece into the frame.  Using fabric adhesive, attach buttons in your desired place.

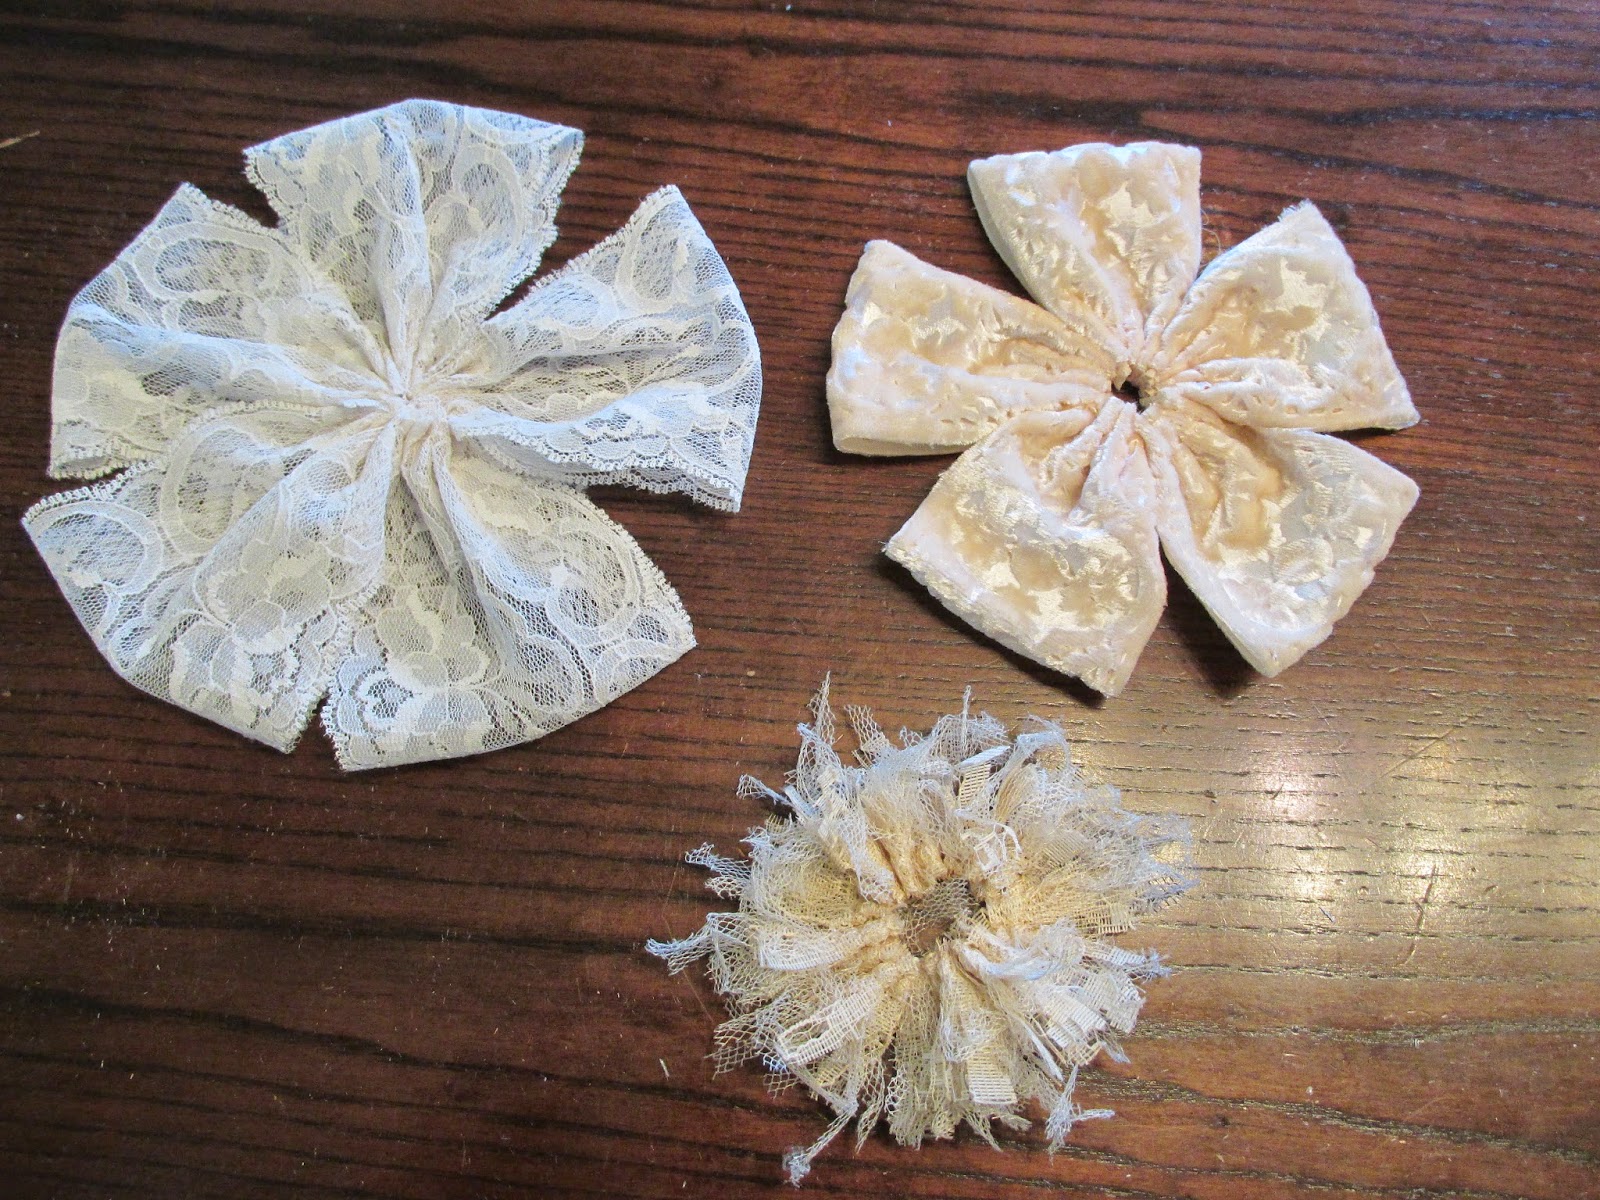
Now comes the fun part of using all of those scraps.  Cut 5 pieces about 3" wide and varying lengths (3 to 5" long).  Layer in random ways to make your fabric badge.  I like to stitch a couple of them for fullness around the bezel.  Be creative and do what your heart desires!  

Wire wrap a pearl and your Spellbinder A Gilded Life Relic to the bottom of the bezel.
With a simple stitch, attach the bezel to the fabric badge.  Tie a bow with your seam binding and add it under the bezel.

Hot glue the badge to your cork board frame.  Attach buttons and Spellbinder A Gilded Life Relics to tacks with adhesive.

Voila!  Finished!!
I hope you enjoyed this fun, little project.  And if you are like me, once you get started it just doesn't stop!
The badges are addicting to make.   I decided I needed one for my sewing room.  

You have 48 hours to enter to win the Spellbinders A Gilded Life products offered in this tutorial.  You will receive the Shield Bezel Die Cut, the Shield Bezel, Relics A, and the Quatrefoil Band Die.

Visit these girls for more chances to win!


XOXO,
LONNIE


Wednesday, July 16, 2014


Spellbinders A Gilded Life
Summer Showcase and Giveaway
Day 3

Relic Prize Ribbon

I am so excited to be sharing this project with you using Spellbinders A Gilded Life products.  I love this line they have designed....romantic, elegant, and vintage all rolled into one.  It's been an honor to be included in this great team of designers!  Hope you enjoy the project!


Spellbinders A Gilded Life Supplies
MMM-001 Artisan X-plorer Machine (not included in giveaway)  ( Found Here)
GLLD-002 Imperial Border Long Die (Found Here)
GLLD-007 Vintage Brocade Long Die (Found Here)
Relics B Relic Charms (Found Here)
GL2-002 Crowned Medallion ( Found Here)
Other Supplies
Vintaj Metal Paint - I used Quartz
1/4 yard velvet
2 yards - 3" wide lace
2 yards - seam binding
Fringe Lace
1 yard - 1/4" wide lace
Fabric Glue
Rhinestones for Crown
Jewelry Adhesive
Extra Fine Jewelry Sandpaper
Jewelry Cutters
Novacan Black Patina


First off, remove the loops on Crowned Medallion and the Relic piece.  Lightly sand the Crowned Medallion.  Now paint it with the Vintaj Metal Paint.  Let dry and apply and re-coat.  Once dry sand again for aged effect.  Mix a small amount of black patina and water and antique the Crowned Medallion.  Dry completely.  Using your jewelry adhesive, glue the Relic piece onto the Crowned Medallion  and the small rhinestones to the Relic.  Let dry.


Using your Spellbinders Artisan X-plorer cut out your pieces with the velvet fabric.  You will need to cut 6 pieces with the Vintage Brocade Long Die and 2 pieces with the Imperial Border Long Die.  Using the 3" wide lace cut 5 pieces 6" long and 1 piece 24" long.  Using the Vintage Brocade pieces, cut 5 pieces to 5" long.  Weave the 1/4"wide lace in between the slots in the Imperial Border pieces.  Tack on the ends with fabric glue.  Cut your seam binding into random lengths of your desire.  


When making your rosette, fold your lace pieces in half and make a running stitch on the open ends and join together.  Repeat for the velvet pieces.  Using fringe lace, gather the top edge and tie together.  Layer all 3 pieces together and stitch to attach.
Layer the ribbon sections together in the order pictured above.  Attach the rosette to the center.  Mine is stitched but it can be glued with fabric adhesive.  Tie assorted Relic charms to the seam binding.

Using the Crowned Medallion, attach it with thread to your ribbon.  


Using a paper scrap, cut out a circle to cover your stitches on the back of the ribbon.

You will have 48 hours to enter to win the Spellbinders A Gilded Life products.


I hope you enjoyed this little project and find the prize spot for it to enhance your home!
Follow along with the other blogs for more chances to win and for great design projects!
Sue Elseth
Lynn Stevens
Kim Laws


Contest Questions?

Thursday, July 10, 2014

Something fun is coming!!

Tuesday, July 8, 2014

It's been too long.  
This blog has been sitting idle for almost 3 years and that is kind of scary.  Has life really been that busy.  
So many things can happen in such a short time.  
This guy and I have been married 29 years.

Jennifer, Mike, Peyton and Paige
Oh how they grow.
 Peyton is 5 and Paige is 3.  
Christina, Pat, Eli and Logan
These two little boys are a hoot!
Eli is 3 and Logan is 1.
Brian and Kayla
And he found his princess!!
These two just got married in June!

Melissa and Rhyon
These two are working on moving back to Tillamook!!

Stephanie and Anthony
And another wedding in our future.
These two are getting married in November.
Chris
Finishing up his last year at OSU and then heading to Optometry School.
He's going to be a busy kid!


 And now we are updated on the family front!!
Fun and new things coming soon!!
Stay Tuned!

xoxo
Lonnie