
Spellbinders A Gilded Life
Summer Showcase and Giveaway
Day 3
Relic Prize Ribbon
I am so excited to be sharing this project with you using Spellbinders A Gilded Life products. I love this line they have designed....romantic, elegant, and vintage all rolled into one. It's been an honor to be included in this great team of designers! Hope you enjoy the project!
I am so excited to be sharing this project with you using Spellbinders A Gilded Life products. I love this line they have designed....romantic, elegant, and vintage all rolled into one. It's been an honor to be included in this great team of designers! Hope you enjoy the project!

 |
| Spellbinders A Gilded Life Supplies MMM-001 Artisan X-plorer Machine (not included in giveaway) ( Found Here) GLLD-002 Imperial Border Long Die (Found Here) GLLD-007 Vintage Brocade Long Die (Found Here) Relics B Relic Charms (Found Here) GL2-002 Crowned Medallion ( Found Here) |
 |
| Other Supplies Vintaj Metal Paint - I used Quartz 1/4 yard velvet 2 yards - 3" wide lace 2 yards - seam binding Fringe Lace 1 yard - 1/4" wide lace Fabric Glue Rhinestones for Crown Jewelry Adhesive Extra Fine Jewelry Sandpaper Jewelry Cutters Novacan Black Patina |

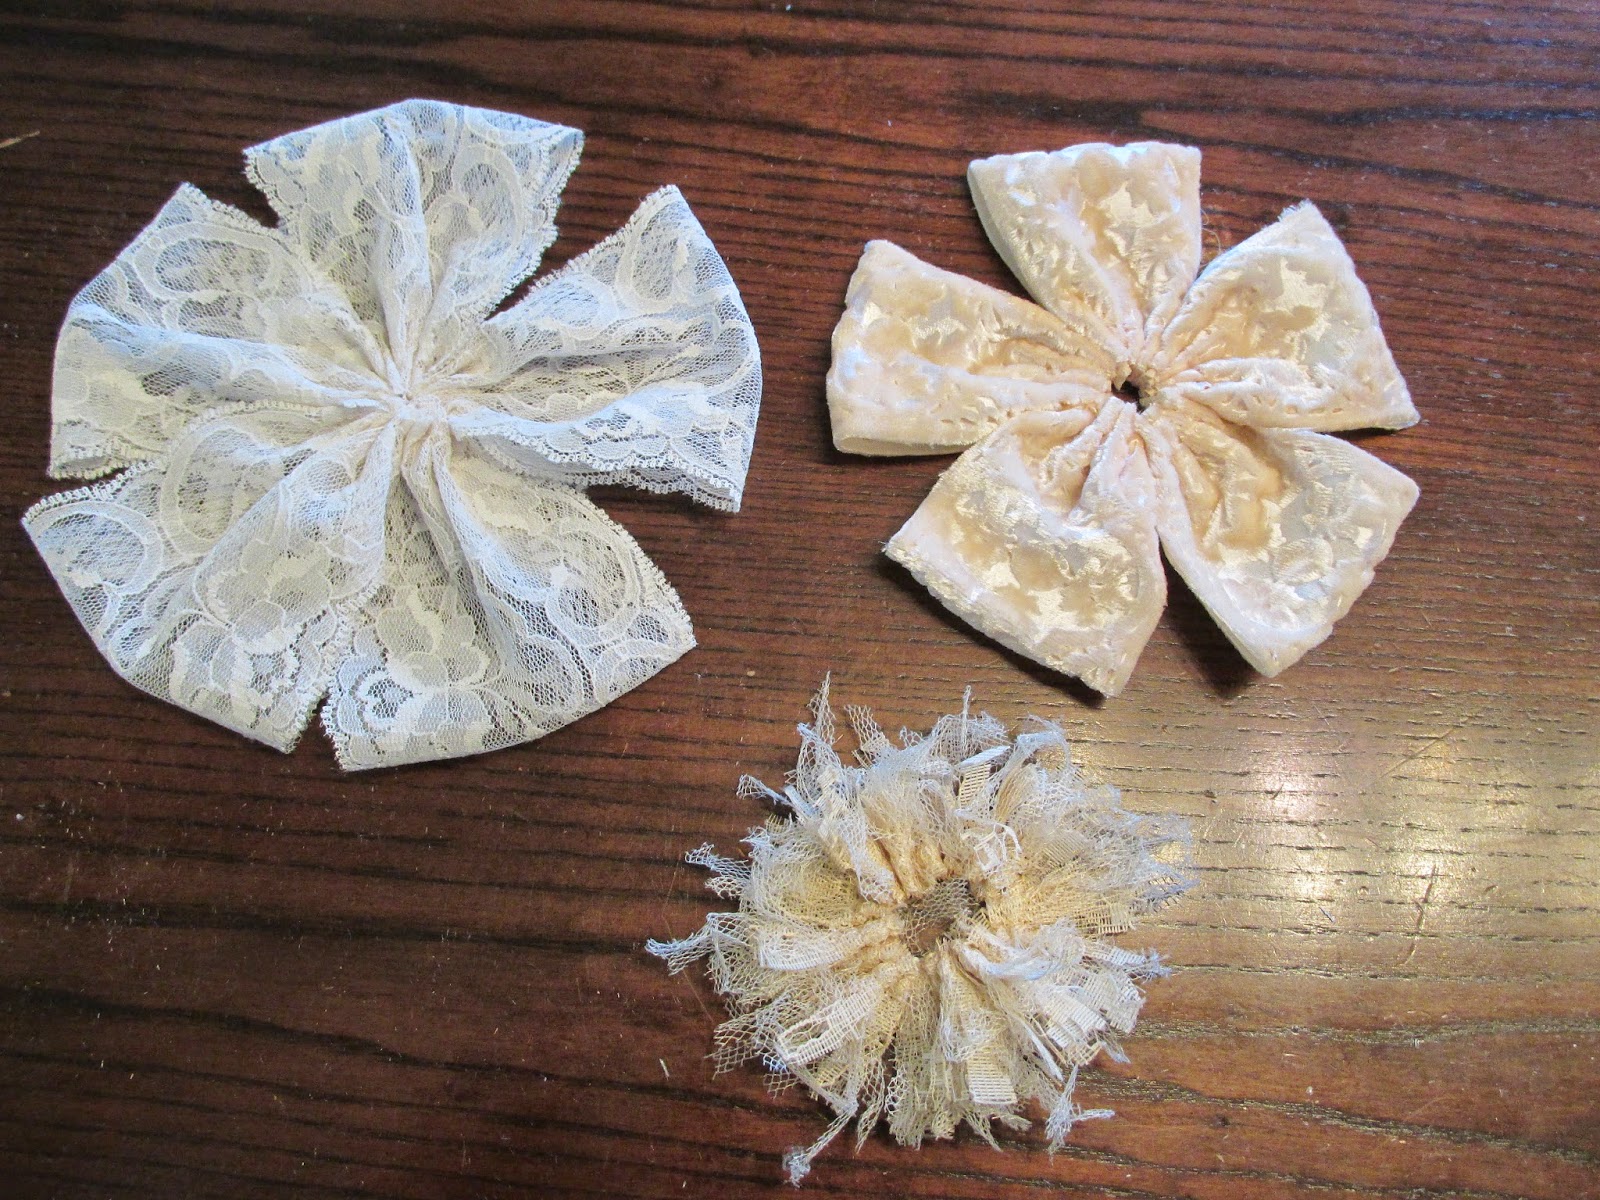
Using your Spellbinders Artisan X-plorer cut out your pieces with the velvet fabric. You will need to cut 6 pieces with the Vintage Brocade Long Die and 2 pieces with the Imperial Border Long Die. Using the 3" wide lace cut 5 pieces 6" long and 1 piece 24" long. Using the Vintage Brocade pieces, cut 5 pieces to 5" long. Weave the 1/4"wide lace in between the slots in the Imperial Border pieces. Tack on the ends with fabric glue. Cut your seam binding into random lengths of your desire.

 |
Layer the ribbon sections together in the order pictured above. Attach the rosette to the center. Mine is stitched but it can be glued with fabric adhesive. Tie assorted Relic charms to the seam binding.
Using the Crowned Medallion, attach it with thread to your ribbon.

Using a paper scrap, cut out a circle to cover your stitches on the back of the ribbon.

You will have 48 hours to enter to win the Spellbinders A Gilded Life products.
I hope you enjoyed this little project and find the prize spot for it to enhance your home!
Follow along with the other blogs for more chances to win and for great design projects!
Sue Elseth
Lynn Stevens
Kim Laws
Contest Questions?


48 comments:
Love this project, Lonnie!! So sweet!
Gorgeous project thanks for sharing your tutorial
Hi Lonnie. I love the beautiful ribbon rosette, it is so pretty : ) Take care.
I'm really enjoying all the new techniques I'm learning as a result of this hop. This is one of my favorite lines that Spellbinders has to offer and this project doesn't disappoint, it's simply beautiful.
Thank you,
Sar Tann
Prize ribbons always appeal to my inner child and yours also appeals to my romantic side. Beautifully done! Using the dies on the velvet is a fabulous idea that I never would have considered before today - makes me more in love with spellbinders.
Beautiful! Love the vintage ook .
Gorgeous! Thanks for sharig.
As always, these wonderful ladies have used Spellbinders new products to create beautiful projects. I love how creative everyone is.
Delicious!! Love everything about this project! The Crowned medallion is at the top of my list along with these dies!! I would love to make my granddaughter a crown using these dies! Thank you for sharing this gorgeous creation with me!
Gorgeous!
WOUW this is so gorgeous. I absolutely LOVE this amazing vintage looking rosette. It´s sooo beautiful and thanks sooo much for a great tutorial too.
What a beautiful rosette! Love the vintage feel and colors!
Very stunning project.
Beautiful design! I love the layering in the rosette it's very pretty! Thank You for sharing w/ everyone.
I have a weakness for shabby chic rosettes and this one is no exception, actually it is gorgeous! Well done Lonnie, Nicole G
Great project...love it!
Truly beautiful. Absolutely love all the vintage shabby chic elements you added to create this piece. Thank you for sharing how you made it.
What a great project -- LOVE it and all your fun laundry room creations -- great to have a fun place to do (UGH!) laundry, which I've always abhorred! ;`)
Absolutely stunning!
What a lovely creation , sweet and vintage looking, love it!
XxRuth
Gorgeous! All that ribbon and love the Spellbinders pieces too. Wonderful inspiration!
Beautiful project, Lonnie....great products. Love all the lace.
Love these rosettes! Thanks for the inspiration!
So beautiful and regal looking. Great project!
Gorgeous project. Thanks for sharing your tutorial details.
Cheers
Trina
Such a gorgeous project! Thank you for inspiring us! I also took a peek at your family photos....what a beautiful family you have! God bless!!
so pretty
Wow this is so different x
beautiful!!! love the project!
Just beautiful, thank you for sharing
Beautiful project. Thank you for the great tutorial.
This is gorgeous. Love seeing tutorials for all the different techniques.
Pretty project - thanks so much for the detailed tutorial.
Beautiful! The rosette is so gorgeous! xx
WOW! Thanks so much for the tutorial!! I love learning how to use the Spellbinder's products!! They are awesome!!Beautiful project!
Fabulous thank you so much for sharing xxxx
Oh my goodness, this is beautiful! Love how you made your flowers and the Bezels are gorgeous! I can see Brides and Bridesmaids wearing these. I was wondering where you got your lovely velvet ribbon? Thank you for sharing! I must check out your wonderful Blog!!
This is a sweet ribbon! I was in 4-H and if the ribbons looked like this I would have framed them! :) thanks for sharing your technique. Que Bella, -con
Beautiful project, love the vintage look!
Thank you for your tutorial. I would like to try the rosettes and it's interesting what you have done with the Spellbinders medallion.
Thank you for your tutorial. I would like to try the rosettes and it's interesting what you have done with the Spellbinders medallion.
Wonderful project. I love the pink, too.
Gorgeous, loving the lace with the metal!!
Gorgeous project TFS!
Lovely project and thanks for sharing.
Linda D.
Great project Lonnie!!
Very, very pretty!
Post a Comment